Making Dream Catchers
Never having had ever made a dream catcher before, this craft was a skill unknown to us. We wanted to make a dream catcher from a kit as we needed to know how to make it with instructions there in front of us.
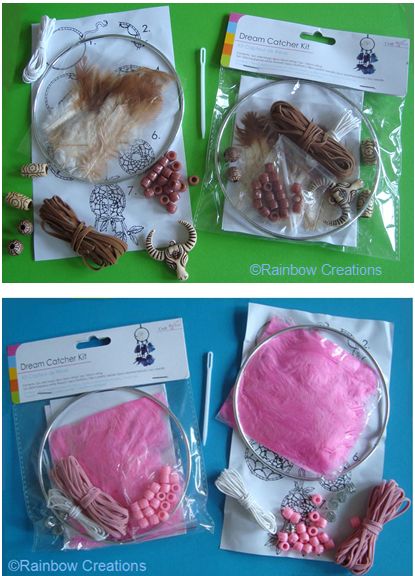
Dreamcatcher Kits are available in two colours, one to make a pink dream catcher and one to make a brown dream catcher.
It is one of those things that having made one for the first time, the second time of making it is much, much easier! We came across a couple of small difficulties, however, through trial and error, we resolved these which gave a great sense of satisfaction.
The kits come with a metal hoop and leather thonging to create the base that the feathers hang from. We worked it out that the best way to stop the thonging unwinding was to use a paper clip to hold it firm whilst the remaining thread is wrapped round the hoop. We also discovered that the stitches need to be a tight as possible in order to create the tension required without the stitches looping.
The macrame stitches look best with a backwards twist. This is done by inserting the needle through the loop of the stitch and the loose thread before pulling tight.
This really is a craft most suitable for older children, teenagers and adults. Two hands, lots of concentration and patience are needed. Little children would find this difficult and frustrating.
A simplified version could be made without making a formal pattern with the stitching. For this we would use an embroidery hoop and colourful yarn wrapped from side to side and in between in a random pattern.
Once done, all that was needed was to add the cords,beads and feathers. This could be done with the help of a small child. Looking at it that way, it would be a great craft for adults to do with small children, in that the completed dream catcher would be shared activity. The finished dream catcher then being hung in the child's room to help keep any bad dreams away.
Dreamcatcher Kits are available in two colours, one to make a pink dream catcher and one to make a brown dream catcher.
It is one of those things that having made one for the first time, the second time of making it is much, much easier! We came across a couple of small difficulties, however, through trial and error, we resolved these which gave a great sense of satisfaction.
The kits come with a metal hoop and leather thonging to create the base that the feathers hang from. We worked it out that the best way to stop the thonging unwinding was to use a paper clip to hold it firm whilst the remaining thread is wrapped round the hoop. We also discovered that the stitches need to be a tight as possible in order to create the tension required without the stitches looping.
This really is a craft most suitable for older children, teenagers and adults. Two hands, lots of concentration and patience are needed. Little children would find this difficult and frustrating.
A simplified version could be made without making a formal pattern with the stitching. For this we would use an embroidery hoop and colourful yarn wrapped from side to side and in between in a random pattern.
Once done, all that was needed was to add the cords,beads and feathers. This could be done with the help of a small child. Looking at it that way, it would be a great craft for adults to do with small children, in that the completed dream catcher would be shared activity. The finished dream catcher then being hung in the child's room to help keep any bad dreams away.


Comments
Post a Comment
Questions, comments or ideas always welcome